Do you want to ferment vegetables, but don’t know which equipment to opt for? This article shows you the different vegetable fermentation supplies options, so you can succeed with your fermented vegetable recipes every time.
Whatever your preferences or budget, this article will have a solution to suit you!
Go straight to the section that interests you:
- Lacto-fermentation kits
- Lacto-fermentation containers
- Lacto-fermentation weights
- Other useful lacto-fermentation supplies
What Type of Equipment Should You Use to Do Lacto-Fermentations?
For successful lacto-fermentations, you need to create an oxygen-free (anaerobic) environment!
This is the most important thing to remember!
To achieve this, you need:
- An airtight container.
- A weight to keep the vegetables submerged (away from oxygen).
- A way to let the CO2 out, without letting the oxygen in.
Equipment and utensils must be clean, but they don’t need to be sanitized before use.
Rest assured! It’s easier than you think and there are plenty of equipment options. Read on to find out which are the most practical, the most popular, and the most affordable vegetable fermentation supplies!
To find out more about how to make a lacto-fermentation, read our guide to Learn How to Make Lacto-Fermentations.
Kits
The most popular way to get started is to buy a kit. If you prefer simplicity and are looking for an all-in-one option, a complete kit could be the ideal solution for you!
Revolution Fermentation Kits
Discover our lacto-fermentation kits created with passion:
We’ve designed them to be simple, practical, and sustainable.
Each kit consists of:
- 3 Le Parfait jars (3x1L).
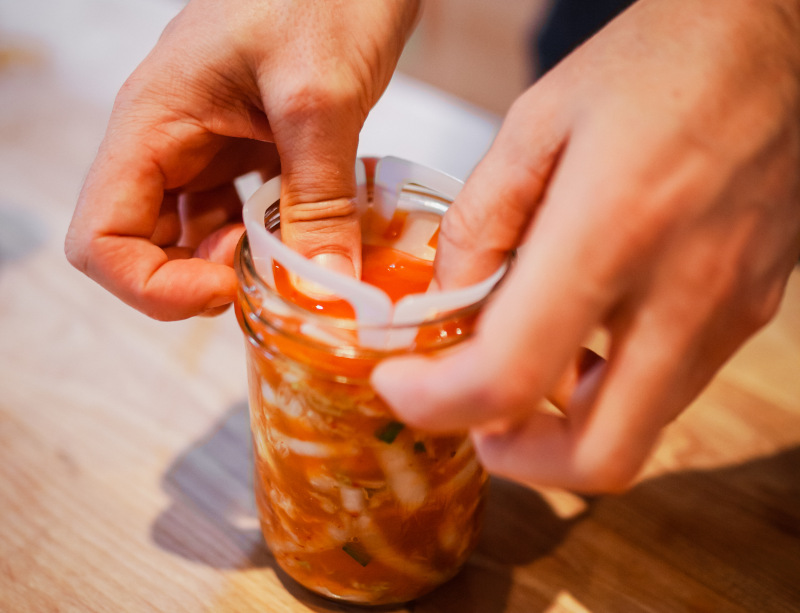
- 3 ViscoDisc inserts.
- 3 salt sachets.
- Step-by-step user guide and recipes.
Highlights:
- CO2 automatically escapes from the jars, without allowing oxygen to enter.
- The user guide is designed for an easy start.
- The 1 litre format makes it very convenient to calculate salt.
Things to Consider:
- Simple packaging with a focus on functionality (100% recyclable).
Masontops Kit
If you already own Mason, Bernardin, or similar jars and are looking for the right accessories to get you started with lacto-fermentation, the Masontops Kit is an excellent solution for completing your fermentation equipment!
The kit contains:
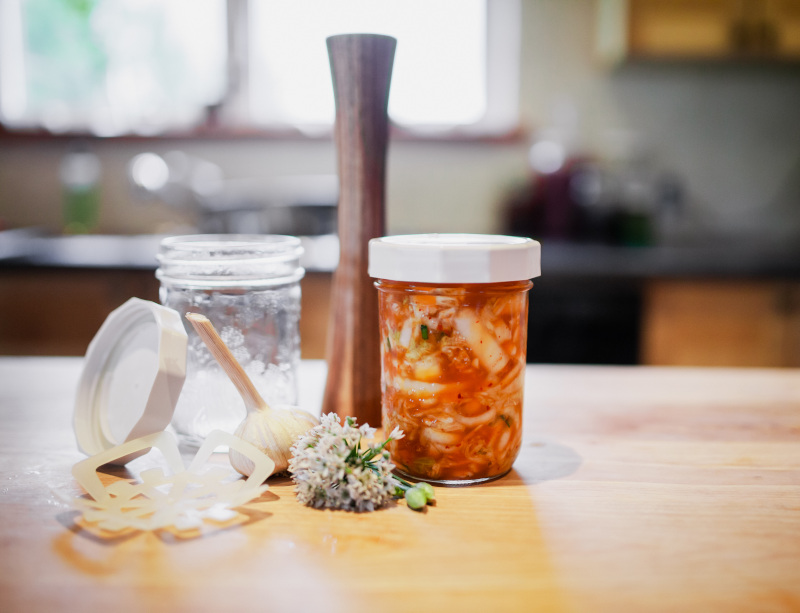
- 4 glass weights, to keep your vegetables submerged
- 4 Pickle Pipe fermentation lids, to let the CO2 out
- 1 fermentation pestle, to pack your vegetables efficiently
- 1 recipe handbook (in English)
Masontops Vegetable Fermentation Kit
$50.00 - $59.99
Easily make homemade fermented vegetables with the Masontops Vegetable Fermentation Kit!
Shop nowHighlights:
- Perfect for complementing your existing jars
- Efficient glass weight and pestle for packing vegetables
- Colourful Pickle Pipes
Things to consider:
- You cannot touch the Pickle Pipes’ valve to prevent oxygen from entering.
- Pickle Pipes should be cleaned and dried thoroughly.
Crazy Korean Cooking kit
For lovers of generous recipes with a minimum of clutter, the Crazy Korean Cooking fermenting containers offer an efficient and compact all-in-one solution.
Available sizes: 1.7L, 3.4L, 5.2L and 6.4L
These containers feature an ingenious internal lid that keeps vegetables submerged while allowing CO2 to escape through a small valve (to be opened during fermentation). $34.50 - $72.00 The Crazy Korean Cooking premium container is ideal for home fermentation of kimchi, sauerkraut, pickles and more!Crazy Korean Cooking Premium Kimchi Container
Highlights:
- Good value for money
- Ample capacity yet compact, ideal for storing in the fridge
Things to Consider:
- Made of plastic (food grade)
Lacto-Fermentation Containers
Buying or reusing containers offers a huge range of possibilities. There are all sorts of sizes and lids. That’s the advantage, but also the disadvantage when you’re looking for a lid for a particular jar… As with socks, they get lost who knows where…
Here are the main types of containers:
- Glass jars (screw-on lid)
- Glass jars (lever lid)
- Ceramic pots
- Sous-vide
Glass Jars (screw-on lid)
Glass jars with screw-on lids are great for getting started. Bonus: you probably already have everything you need in your kitchen!
Choose any glass jar you like, jam jars, tomato sauce jars, or the traditional «Mason» or «Bernardin» jars. The latter have the advantage of standard lids that are easy to replace.
What weight should I choose for a glass container?
As vegetables tend to float, you need to find a way of keeping them submerged under the brine. Otherwise, there’s a risk of mould forming on the surface (no oxygen = no mould). This is done using a weight.
The following weights are suitable for making lacto-fermentations:
- Cabbage leaf
- Glass weights
- Counterweights (inserts)
- Plastic bags
- Other creative techniques (rock, shooter glass, etc…)

For more information on fermentation weights, see the Lacto-Fermentation Weights section.
How do you let the CO2 out of a glass container?
During the first few days of fermentation, carbon dioxide (CO2) is formed. It is essential to let this gas escape (to avoid excess pressure), without letting oxygen enter (and cause mould) the container. Lids, therefore, play a very important role.
Choosing the right lid is essential for successful lacto-fermentation. Each option has its advantages and disadvantages, so don’t hesitate to experiment to find the one that best suits your needs.
To make your choice easier, we’ve created a summary of lid options for lacto-fermentation in the table below:
| Option | Description | Highlights | Things to consider |
|---|---|---|---|
| Standard lids | Metal lids, compatible with Mason & Bernardin jars. | Easy to find | Rust quickly Tighten, but not too much |
| Plastic lids | Compatible with Mason or Bernardin jars. The silicone strip lets out the CO2. | Do not rust | Tighten, but not too much |
| Plastic rings (Tattler) | Compatible with Mason or Bernardin jars. Sustainable option. | Do not rust | Tighten, but not too much |
| Lids with airlocks | Slightly complex to install but work perfectly. | Effective | Install and keep full |
| Valves and silicone tops (Pickle Pipe) | Good to begin with, but less effective in the long term. | Easy to use | Less effective in the long term |
Standard Lids
Classic metal lids are very accessible and compatible with Mason or Bernardin jars. However, their tendency to rust quickly, due to the acidic nature of lacto-fermentation, is a disadvantage to be taken into consideration. Tip: Tighten sufficiently without using too much force, and don’t touch the lid again until you’re ready to enjoy!

Plastic Lids $15.00 - $17.00 Turn any jar into an airtight container with these Tough Tops reusable Mason jar lids!
These have a silicone strip that allows the CO2 to escape while maintaining the seal. The fact that they don’t rust is a significant advantage. Tip: As with the standard lids, tighten judiciously and don’t touch the lid again until you’ve tasted it, then, refrigerate!Tough Tops Airtight Reusable Mason Jar Lids (Pack of 4)
Plastic Rings (Tattler) $23.70 - $29.40 Tattler reusable canning lids are a durable alternative to metal lids for canning jars.
This option is particularly long-lasting and will not rust. They require an initial investment but pay off in the long run. Tip: Tighten, but not excessively, and don’t touch the lid again until you’re ready to enjoy!Tattler Reusable Canning Lids (Pack of 12)
Lids With Airlocks $18.00 Use your own jars for your fermentation recipes with these regular mouth airlock fermentation lids!
Airlocks are perfect for those looking for flawless fermentation. A little more complex to install, they require monitoring of the liquid level. Tip: Once installed, let the magic happen without touching it!4 Lids With Airlock (Regular Mouth)
Valves and Silicone Tops (Pickle Pipe)
Pickle Pipes are a good choice for beginners. They are easy to use and allow CO2 to escape naturally. However, they are less effective in the long term. Tip: Tighten the lid securely and resist the temptation to squeeze the valve!
Glass Jars (Lever Lid)
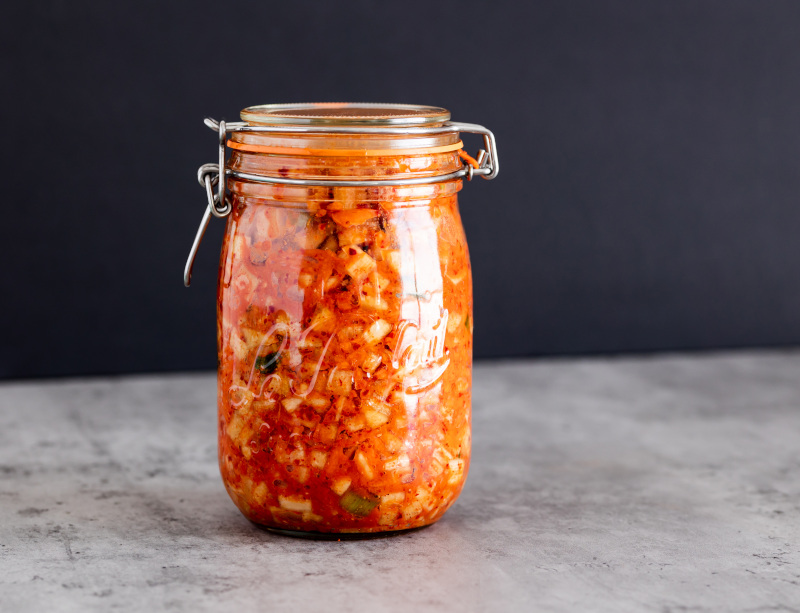
Glass jars with a lever lid system, such as those from Le Parfait, are an ideal option for fermenting. These jars are specially designed to ensure that the fermentation process runs smoothly.
They have a lid attached to the container, which is closed using a lever system. A rubber seal ensures that the jar remains airtight. These jars are versatile and available in a variety of formats, making them suitable for different fermentation volumes.
The rubber seal will wear out over time. It is therefore essential to replace it when it has lost elasticity.
What weight should I choose for a lever jar?
As with screw-top jars, it’s crucial to keep the vegetables under the brine during fermentation. Options such as a cabbage leaf, glass weights, counterweights, or improvised weights work well with this type of container.

These jars are generally compatible with large weights or inserts.
See the Lacto-Fermentation Weights section to find out more about these options.
How do I let the CO2 out of a lever jar?
Lever jars have the unique ability to naturally release the pressure built up inside during fermentation. You can sometimes hear them making “pchiiit” noises as the CO2 escapes through the rubber seal. However, the lever ensures that the airtight lid stays tightly sealed.
If the rubber seal is worn or old, it may no longer be effective. In this case, it is advisable to replace it to avoid excessive pressure build-up.
It’s also important to note that not all lever-action jars are of the same quality. Some cheap containers may have poorer quality levers that can bend or break over time.
Le Parfait Super Glass Jars (Pack of 6)
$59.85 - $62.95
The essential jar for fermenting, now available in Canada!
Shop nowHighlights:
- Made of glass
- Sustainable
- Automatic degassing
Things to Consider:
- The jars sold at Dollarama and IKEA have poor glass and metal quality.
Sous-Vide
Did you know that you can also use a sous-vide machine to make fermented vegetables? This method involves placing vegetables and salt in a bag, extracting the air with the vacuum machine, and letting them ferment.
This option is ideal for professionals or those who want to do quick tests with small quantities of fermented vegetables.
With the sous-vide method, there’s no need to use weights, as extracting the air from the bag prevents mould from forming. However, the bag will swell and could burst due to the CO2 produced during fermentation. If the bag is over-inflated, simply make a small incision to release the gas, then reseal with the machine.
Highlights:
- Practical and versatile
- Reliable
Things to consider:
- Requires plastic
Ceramic Jar
Before the advent of glass, plastic, and stainless steel, fermentation was commonly carried out in clay containers.
Traditional jars are available in a variety of large sizes. This can be ideal for those wishing to prepare large quantities of fermented vegetables for consumption throughout the year.
Traditional fermenting jars are fitted with half-moon-shaped ceramic weights, which help keep the vegetables submerged under the brine. If they are missing, these weights can be replaced by small plates and a weight.
Some jars have grooves around the opening where the lid rests. By filling this groove with water, it acts as an airlock, allowing CO2 to escape without allowing oxygen to enter the jar.
Highlights:
- Traditional and attractive appearance
- Made from natural materials
- Ideal for large quantities of fermentations
Things to consider:
- Costly
- Fragile
- Water needs to be added to the groove regularly due to evaporation
Types of Weights for Lacto-Fermentation
Weights play an essential role in fermentation by ensuring that the vegetables remain submerged under the brine, essential for successful fermentation.
There are many options available, and the choices on offer are generally compatible with the glass jars mentioned earlier in this article.
| Option | Description | Highlights | Things to consider |
|---|---|---|---|
| Cabbage leaf | Use a cabbage leaf or any other piece of vegetable large enough to prevent the vegetables from rising to the surface. | Natural and easy to use | Must be immersed to prevent mould. May require additional weight. |
| Glass weights | These are glass discs that are placed over the vegetables to keep them submerged. They fit into standard or wide glass jar openings. | Sustainable, natural, and well-adapted | May be a little more expensive. |
| Inserts | Inserts are placed in the jars to keep the food submerged. | Excellent value for money Effective | May allow small pieces of vegetable to pass through. |
| Plastic bags | Use «Ziploc» type bags as weights by filling them with water, marbles, or pebbles. | Inexpensive | Made of plastic. Not very practical. |
| Other options | Small plates, glass candlesticks, or rocks. | Wide choice of options | Risk of corrosion due to salt and acidity |
Glass Fermentation Weights (Pack of 4)
$22.99 - $24.95
ViscoDisc Canning Buddies Mason Jar Inserts (Pack of 12)
$22.00 - $24.00
Additional Accessories
There are some tools that, although not essential, can be very useful when fermenting vegetables.
- Chef’s knife: A chef’s knife is a versatile tool that is ideal for preparing your vegetables. It allows you to chop or cut your vegetables efficiently.
- Mandoline: This tool is particularly handy for quickly cutting cabbage. Be careful when using it!
- Fermentation pestle: This pestle is ideal for packing sauerkraut and kimchi into jars or other containers. If you don’t have one, you can use a large vegetable, a small bottle or just your hands.
- Kitchen scale: Since most fermentation recipes require calculating the amount of salt based on the weight of the vegetables, having a kitchen scale is very useful.
- Jar funnel: Although not essential, a funnel can be handy to minimize spills when filling jars.
With these tools at hand, you’ll be well-equipped to tackle the fermentation process with confidence and efficiency. Happy fermenting!


